
Needle felting is a creative and therapeutic craft that uses a special needle to shape wool into 3D objects. This method turns raw wool into different shapes, making it a versatile and enjoyable craft for all skill levels.
What makes wool fibers so different? If you're starting to learn about the art of needle felting, you might wonder why the mere act of stabbing the fiber causes it to take shape. After all, stabbing cotton won't give you the same result.
The answer lies in the uniqueness of wool. Wool fibers have a unique surface of overlapping scales, which can only be seen under a microscope.
When you agitate the wool fibers, and they come into contact with each other, the scales interlock, turning the wool into felt. The scales' orientation is pretty random, ensuring a secure bond during the felting process. The more you agitate, aka felt, the stronger the bond.

Needle Felting Materials:
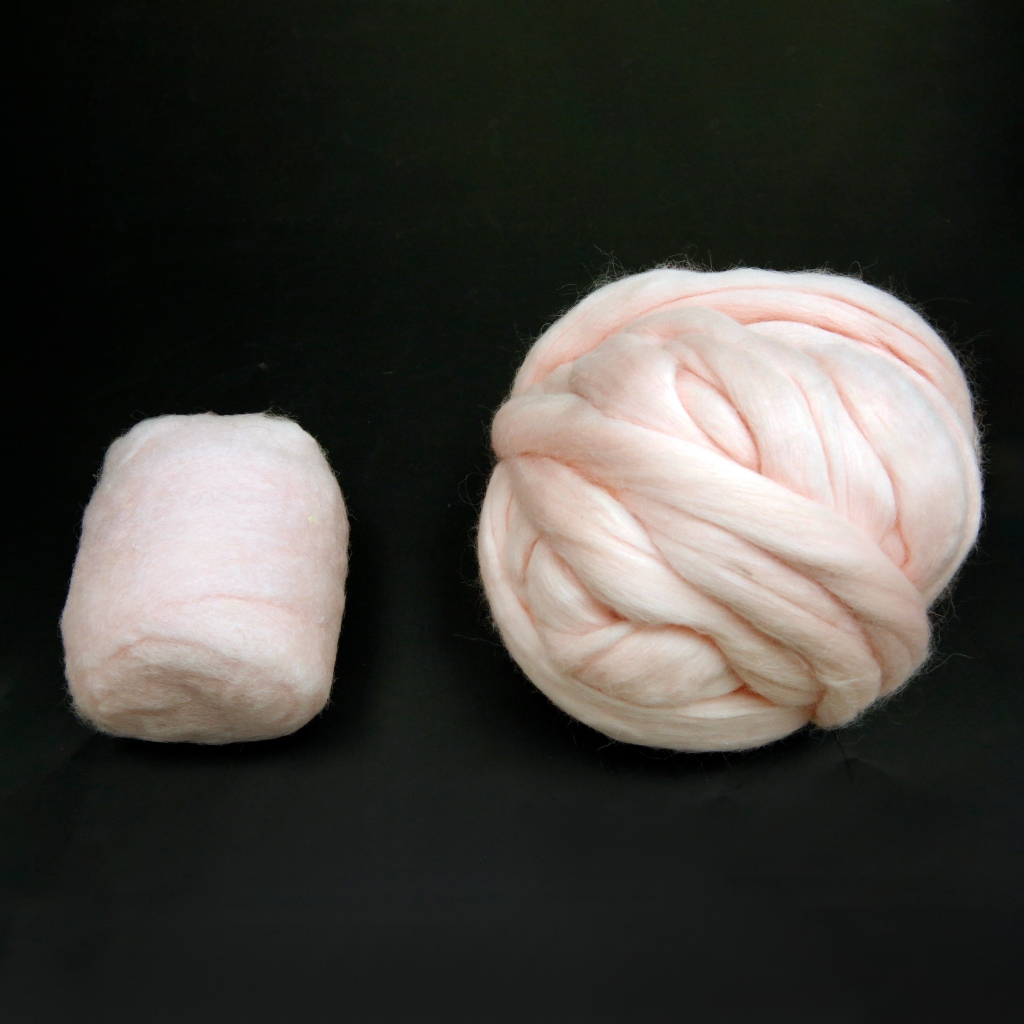
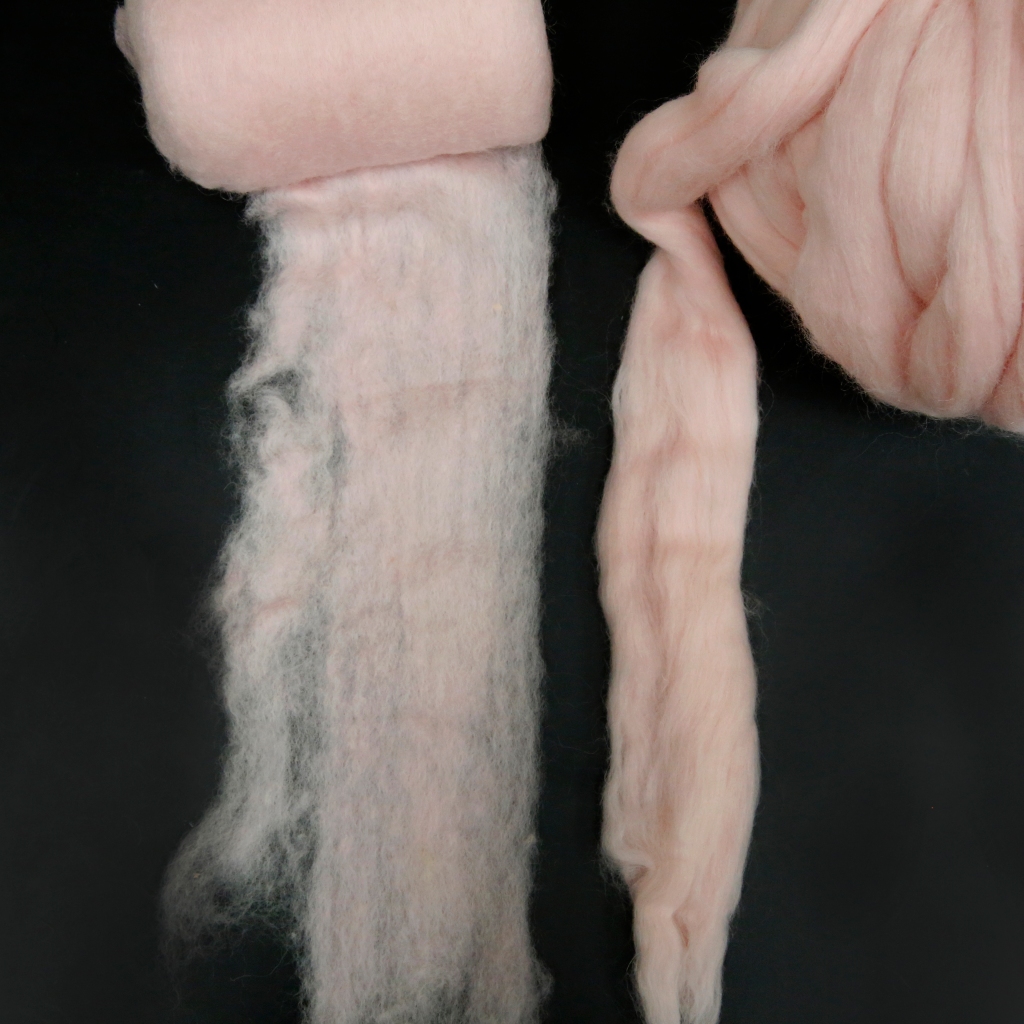
Wool Roving / Wool Batts:
- Wool Roving is unspun, fluffy wool that is perfect for needle felting. Wool roving is the most common material used in needle felting. You can also use wool batting which is great for both wet felting and needle felting. Roving and batting differ in the processing level.
- Roving goes through an additional layer of processing making the fibers more aligned in the same direction. They often are somewhat twisted and come in strands that are wrist width.
- Batting has less alignment in the fibers, feels more textured, and often comes in thin sheets that are layered. Batting is faster for creating your core 3D design. We like to use wool batting to start off our needle felt shape and then switch to wool roving to add the little design details.
Foam Pad/Mat/Cushion:
A dense foam pad or felt pad is essential as your work surface. This needle felting pad provides a firm base for the needles to penetrate the wool without dulling them.
Felting Needles:
Felting needles are not sewing needles. They’re designed to snag the loose fibers and push them in or out on the material you are actively stabbing. Each needle has tiny barbs on the end, enabling them to tangle and mat the fibers together. When the needle is repeatedly stabbed into the wool, the barbs pull the wool in but prevent it from sliding back out. Stabbing tangles the wool fibers and causes the scales to interlock, resulting in felting.
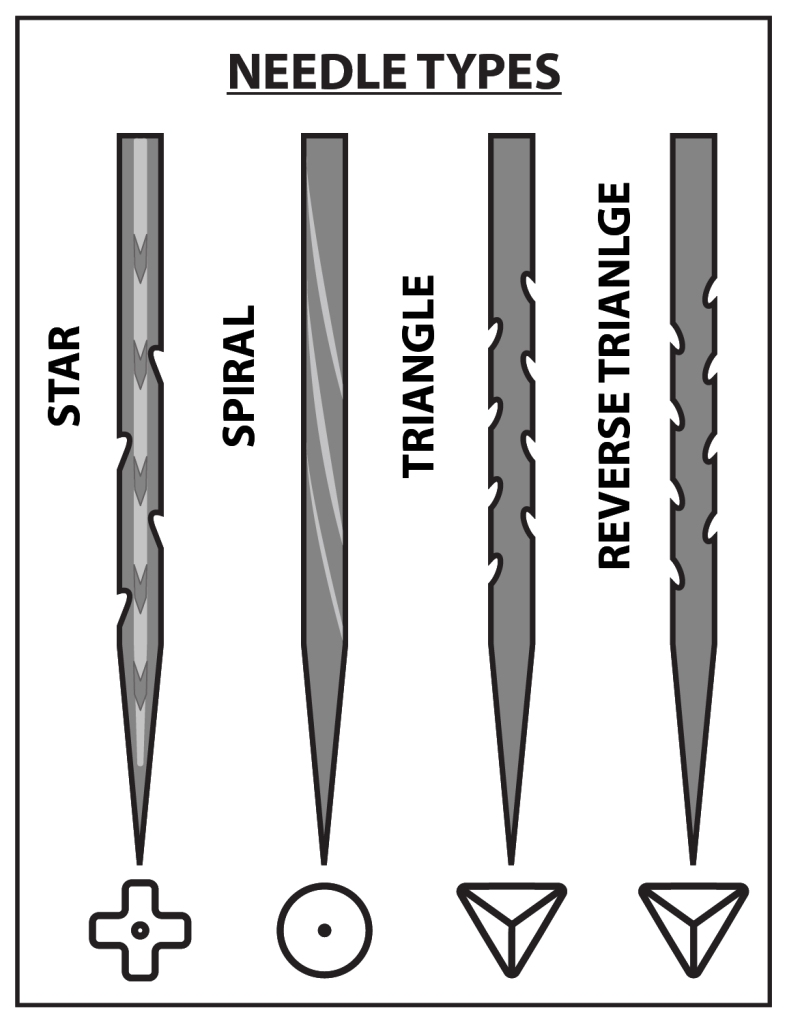
What are the different types of felting needle?
There are many types of felting needles in the market. The common ones are: 1.Triangular 2. Star 3. Spiral (or twisted). 4. Reverse.
The triangular and spiral needles work the same when it comes to the cross-section, except that the blade on the spiral needle is twisted as opposed to straight. Spiral needle will be perfect for a smooth and refined surface. The notches/barbs on triangular and spiral needles are on the three corners going up the shaft.
Whereas the star, has notches/barbs on four corners (and has the cross-section of a 4-pointed star).
Reverse felting needles, are needles that pulls out the fiber, has notches that face the opposite direction so that it can pull the wool fibers apart. This creates a fluffy effect! The reverse felting needle is also triangular in cross section, except that the notches/barbs go in reverse.
Safety!!! Felting needles are extremely sharp, and it only takes one jab to cut your finger with their sharp tips. For protection, it is best to use leather finger cots or leather finger covers while you are needle felting. Return needles to the protective case immediately after use.
What are the different sizes of felting needles?
Felting needles come in different sizes, such as 32, 36, 38, 40, and 42. As the number increases, the needle thins (contrary to what one might think). The thicker needles (smaller gauge size) work better for coarse wool, while the thinner needles (higher gauge size) work better for fine wool.
The felting needle set we sell in our store is a great fit for beginners as it contains a variety of sizes!
- Star Point 38 gauge (Medium) excellent for felting large areas.
- Triangle Point 40 gauge(Extra fine) Detail felting, sculpting and smoothing the surface.
- Triangle Point 38 gauge (Medium coarse) Medium felting and used to attach one item to another.
- Triangle Point 36 gauge (Coarse) Fast felting.
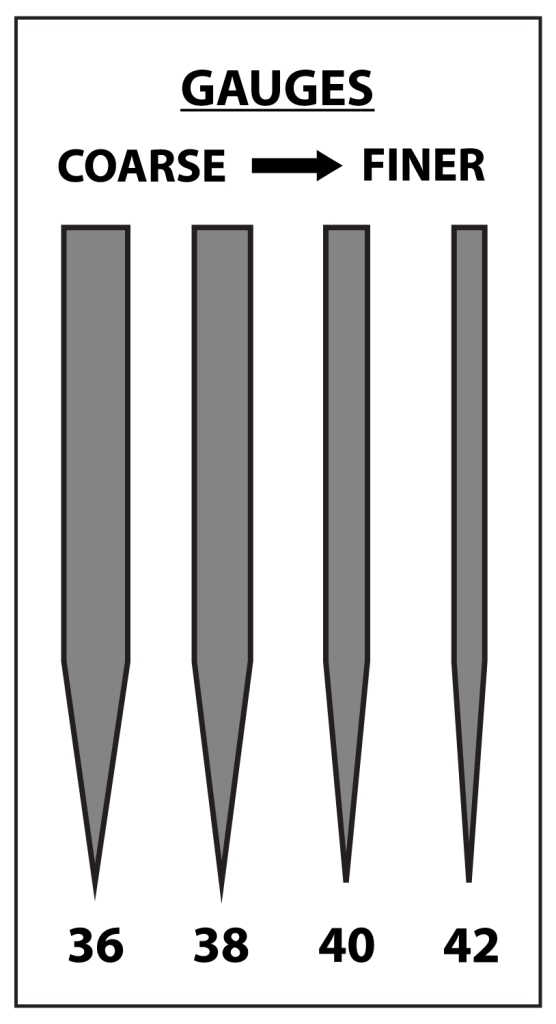
Insert image of the needle size chart here
How do you choose the right needle size?
What size needle to use depends on your design and your wool.
- What is the size of your work?
- The larger the work, the more barbs you want on a needle to quickly shape the roving. Star needles have more corners and more notches/barb so it's great for a large flat area felting. Change your needle to fewer barbs to get more detailed work done like the spiral needles. Needles with more barbs also felt faster when you are felting larger areas. You can also choose pen-like tool that holds 1-5 needles for a faster result. I like to start my 3D shape with 3 or 5 of the Triangle 36 or 38 Gauge. Once that general shape is made, I'll switch up my needle size depending on what detailing I need. If my design is small, I opt to use just 1 needle so I can have more control and avoid poking my fingers.
- What wool type are you using?
- Thinner needles work better with fine wools. Thicker needles work better with coarser wool.
- How many needles do you need?
- Felting needles can be used alone or in groups with needle holders. People often use a single needle for precision work. Multiple needle holders hold more needles together, making felting faster by covering more area with each poke. Check out our Pen Style Needle Felting Toolthat allows you to use one needle for delicate work, two needles for creating lines and outlines, or three needles together for a quick finish. You need a pen holder if you are working with multiple needles but do you need a pen holder for a single needle? The answer is No. If you feel nervous about using a felting needle, a holder might make you feel more comfortable as it provides better grip. So in this case, I do recommend a single needle holder. However, if you have felted before or are just not nervous about using needles in general, you may prefer not to use a holder because you can be closer to the fibers and felt faster.
How do you needle felt?What are the different needle felting techniques?
Prepare Your Workspace:
- Choose the colors of wool roving you want for your project.
- Pull apart small sections of wool roving for easy shaping.
- Place the foam pad on a flat surface.
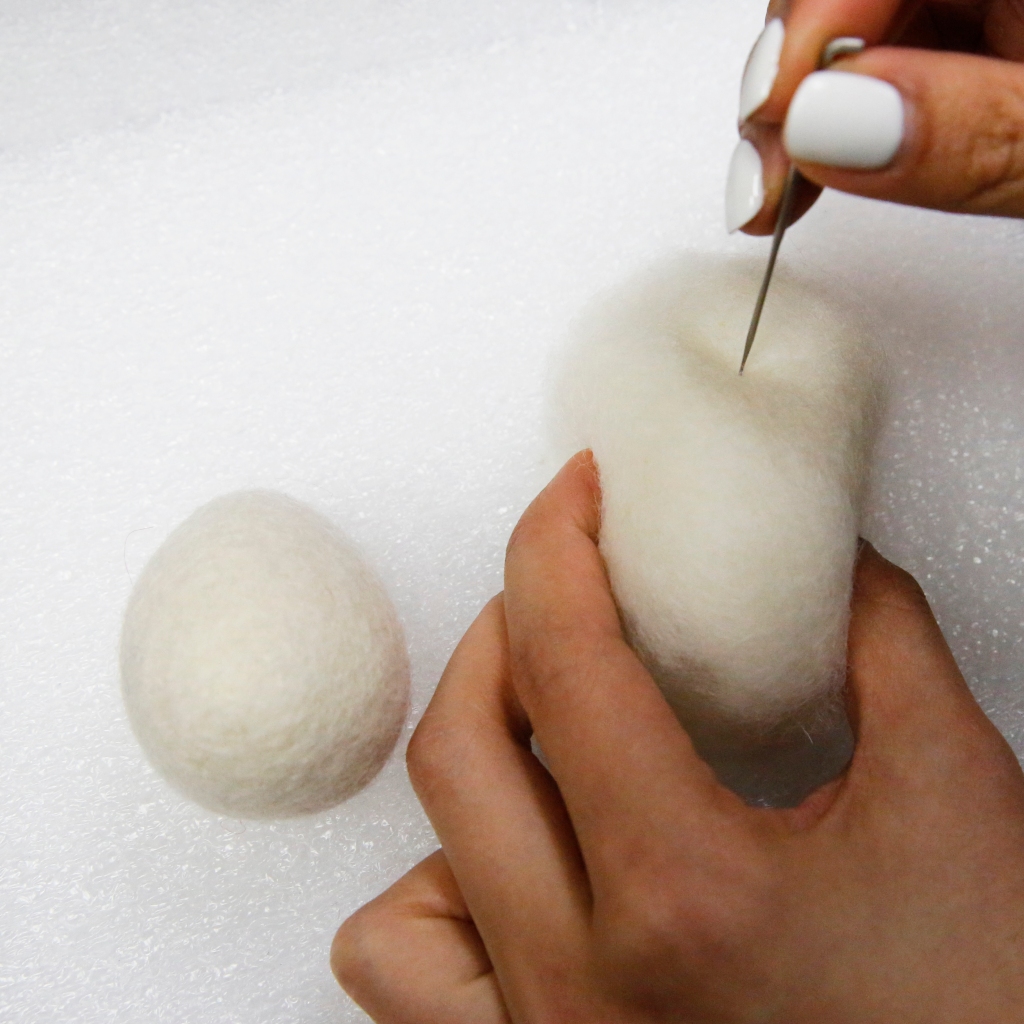
Shape the Wool:
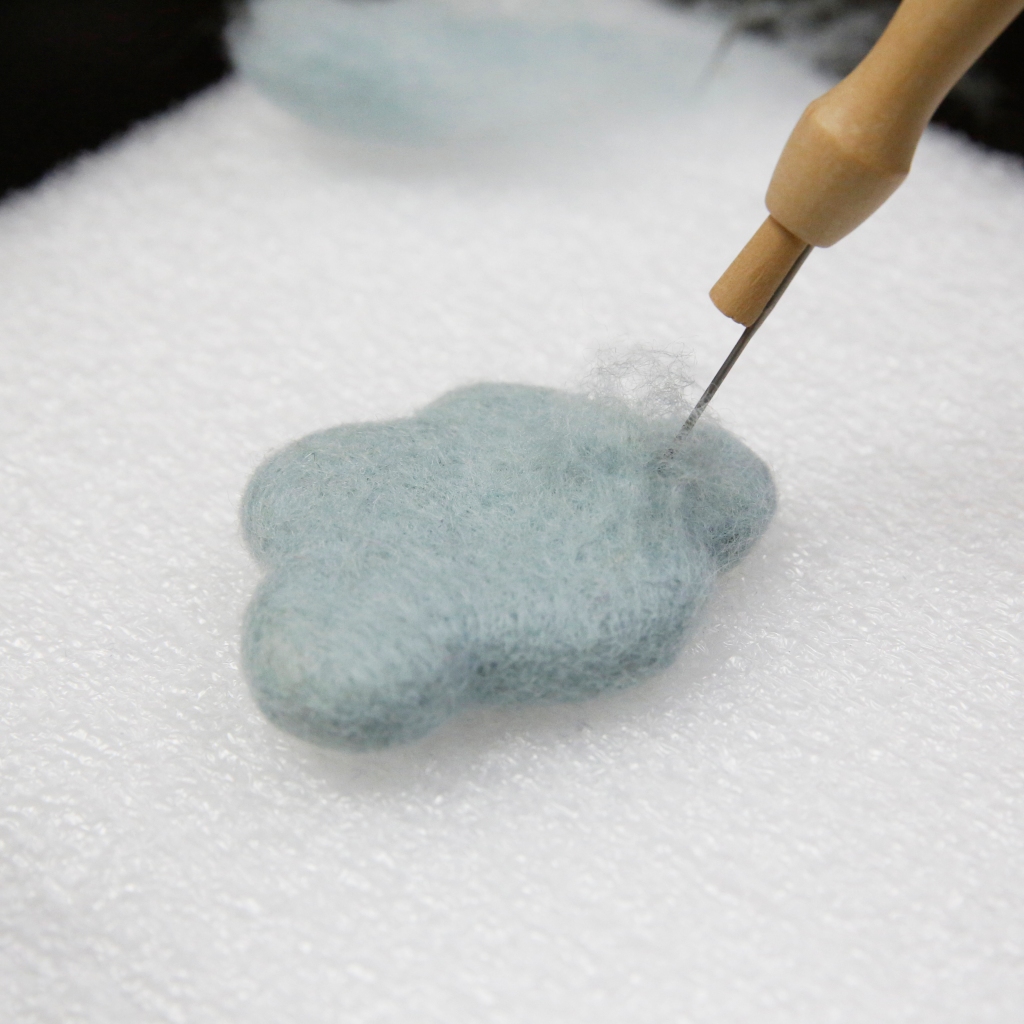
Rounded shapes:
To make rounded 3D shapes, you need to keep the felt moving while working on the shape. Roll up a piece of roving tightly and then poke it all over with the felting needle. Turn it on all sides to felt it evenly. You can stop when there are no loose fibers and the shape has the density that you desire.
Tip: Start with less roving than you think you will need; you can add wool to make your shape bigger. However, once you felt roving together, it's impossible to take it apart.
Flat shapes:
Spread a thin layer of roving on your mat and stab into the fibers to start forming a shape. Lift the shape frequently so it does not attach to the mat/pad. You can also cut shapes out of felt sheets and needle felt a thin layer of wool roving on top of the cut felt shape.
Adding eyes and whiskers:
Make a hole where you want to put the eyes or whiskers using an awl or a blunt needle. Put a little bit of glue to hold them in place.
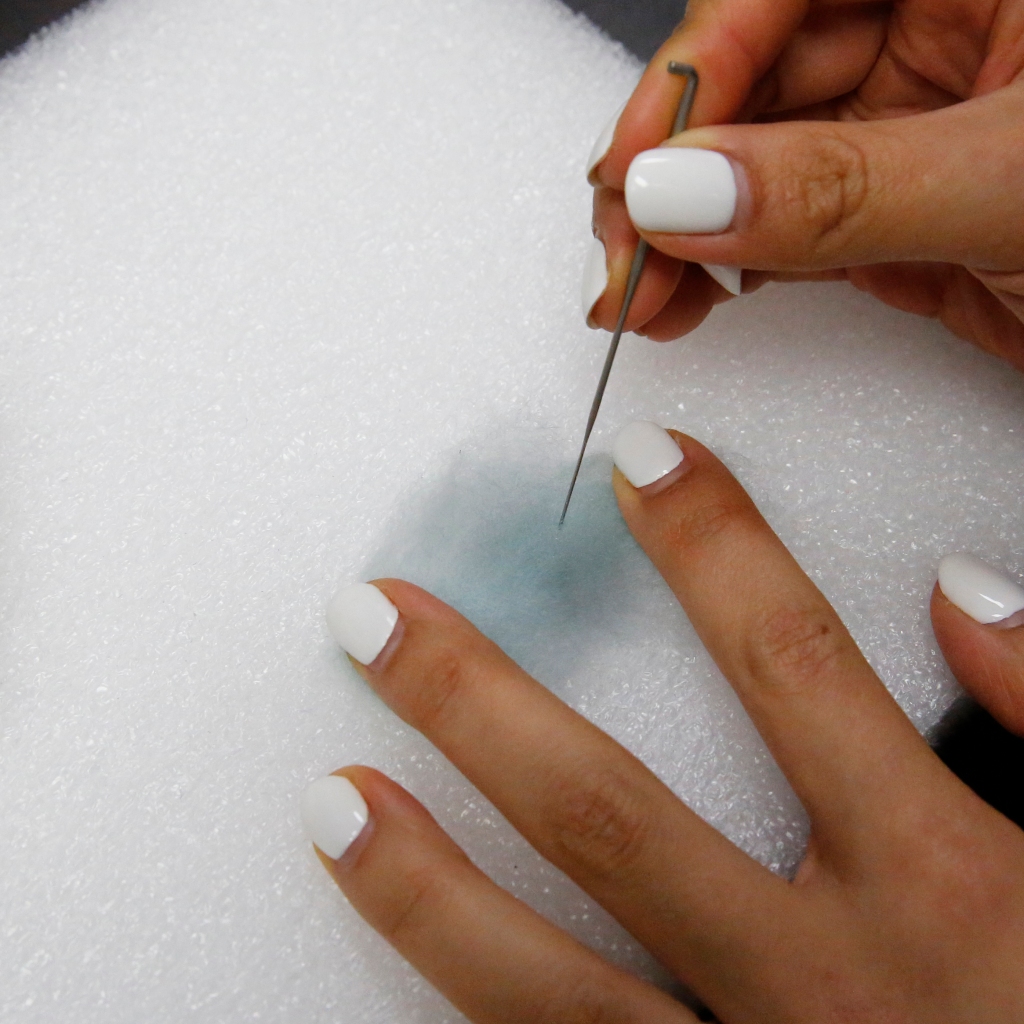
Shading:
A simple way to add depth to your felt shape is through shading. You can add shade to your shape by using pigments such as blush, eyeshadow, or crayon! Shading is great if you are creating realistic felt flowers, succulents, or portraits.
Getting Rid of Stray Strands of Wool:
If you are finished with your needle felting project, you will find that there are often stray strands of wool fiber even though you've used the finest needle to felt in the final details. There are several ways to get rid of that.
- Cut them off with a small scissor or a sweater shaver. Fabric shavers are great but sometimes the shaving had is too big for the needle felted shape. Scissors will allow clean up small corners.
- Gently wet felt the shape in soap and water. Wet felting often gives designs a smooth finish as it mats down the stray fibers. You must wet felt gently so you don't distort your original design. Be mindful that wet felting can sometimes cause colors to bleed so the whites in a design may take on the color of some nearby fibers.
Hope these can help you understand needle felting a bit more. Comment below if you have any questions. We will explain wet needle felting in the other blogs. Thanks for reading!
Interested in trying needle felting? Start your needle felting project with us! We host needle felting classes in our showroom. Subscribe to our email or follow us on social media for more information.


